
We’ve been planning on building a home climbing wall for a long time, we even had most of the supplies just stored around, but hadn’t got around to it. COVID-19 hit, and it was the perfect motivator to finally get our butts moving on this.
This isn’t a How-To video, but more of a “what we did” video. As I mention in the video, I am NOT an engineer, nor am I an expert, this is just what I did. I would recommend consulting a professional before deciding to make anything the could result in injury.
We are happy to be able to boulder again and have climbing back in our lives.
We did also create a time-lapse cut-down of this build that you can find here:
Click here for the Boulder Breakdowns
Click here to watch a video of Climber Dad’s wall
Click here to go to Climber Dad’s site (and build guide purchase)
Here are some materials to get you going on your own wall build:
*Climbing Bolts
*T-Nuts (hammer-ins, I couldn’t find screw-ins)
Some of the holds I am setting with are my own DIY holds!
I will be posting a video about that soon, but in the meantime you can stock up on materials to make your own as well:
DIY Climbing Hold Materials:
*Resin
*Mold making materials – I used a different product in the video
*Mold Release
*All in one kit (low volume)
*Resin Dyes
*Large Stir Sticks
*Small Stir Sticks
*Measuring Cups
*Gram Scale
*All Climbing Products
ONE-TIME 10% OFF COUPON CODE: sendstory10
*These are affiliate links that help us out, thanks!
We plan on continuing to post more content to our youtube channel and instagram account so if you are interested in following along, please like and subscribe for more!
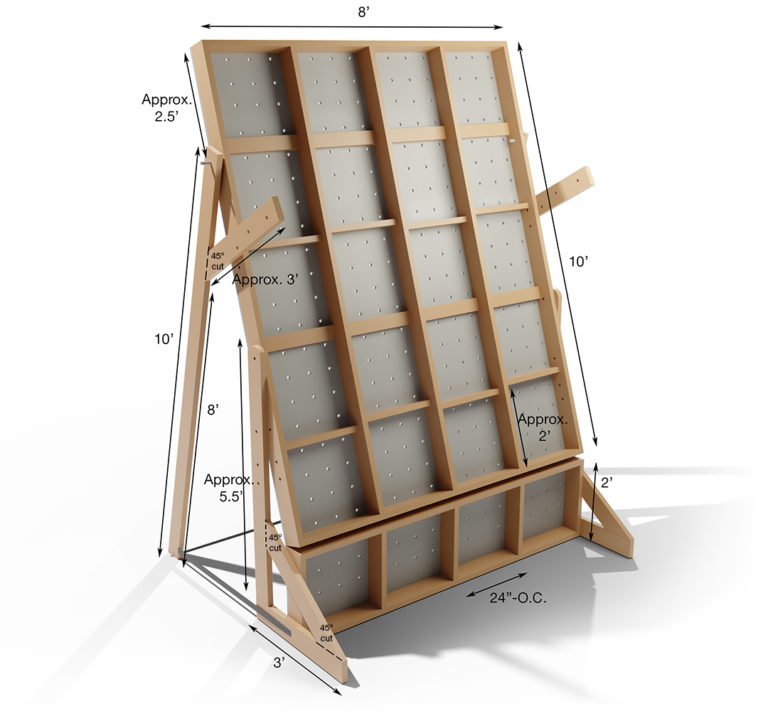
Edit: Some people have asked for some images of my structure, so I made some quick renders and took some photos so you can see what I built in a little more detail.
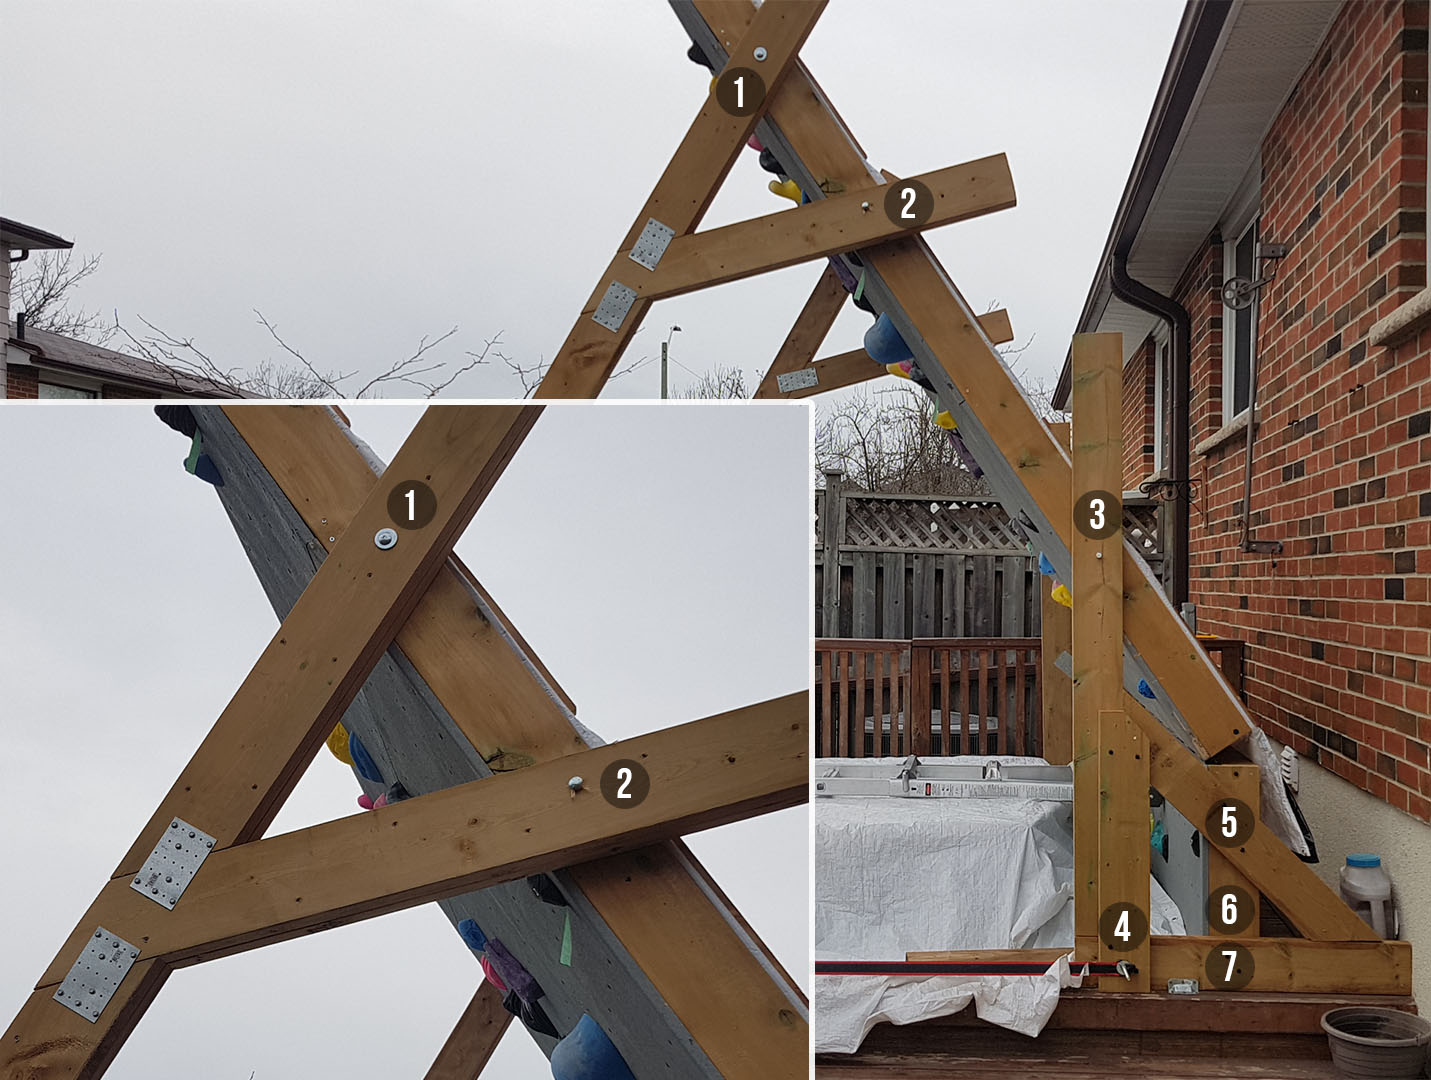
1) Permanent hinging bolt for adjusting legs (3/8″ carriage bolt or thicker, minimum length of 6″), 2) Removable bolt/pin for locking in a position , 3) Removable bolt/pin for locking in a position and also for ensuring the kick-plate does not fold into itself and stays at 90 degrees, 4) Bolt that attaches one end of the ratchet strap and helps tie the support together (3/8″ carriage bolt, minimum length of 3.5″ or 4″), 5) Cross support for the ascending structure (that bolt #3 is attached to) to ensure it stays at a 90 degree/upright, 6) Side plate for the kick-plate that is screwed/bolted to the crossbeam and bottom plate, 7) Bottom plate that connects to the kick-plate, crossbeam, and ascending beam – It also gives further support and keeps the kick-plate upright/from folding in on itself.
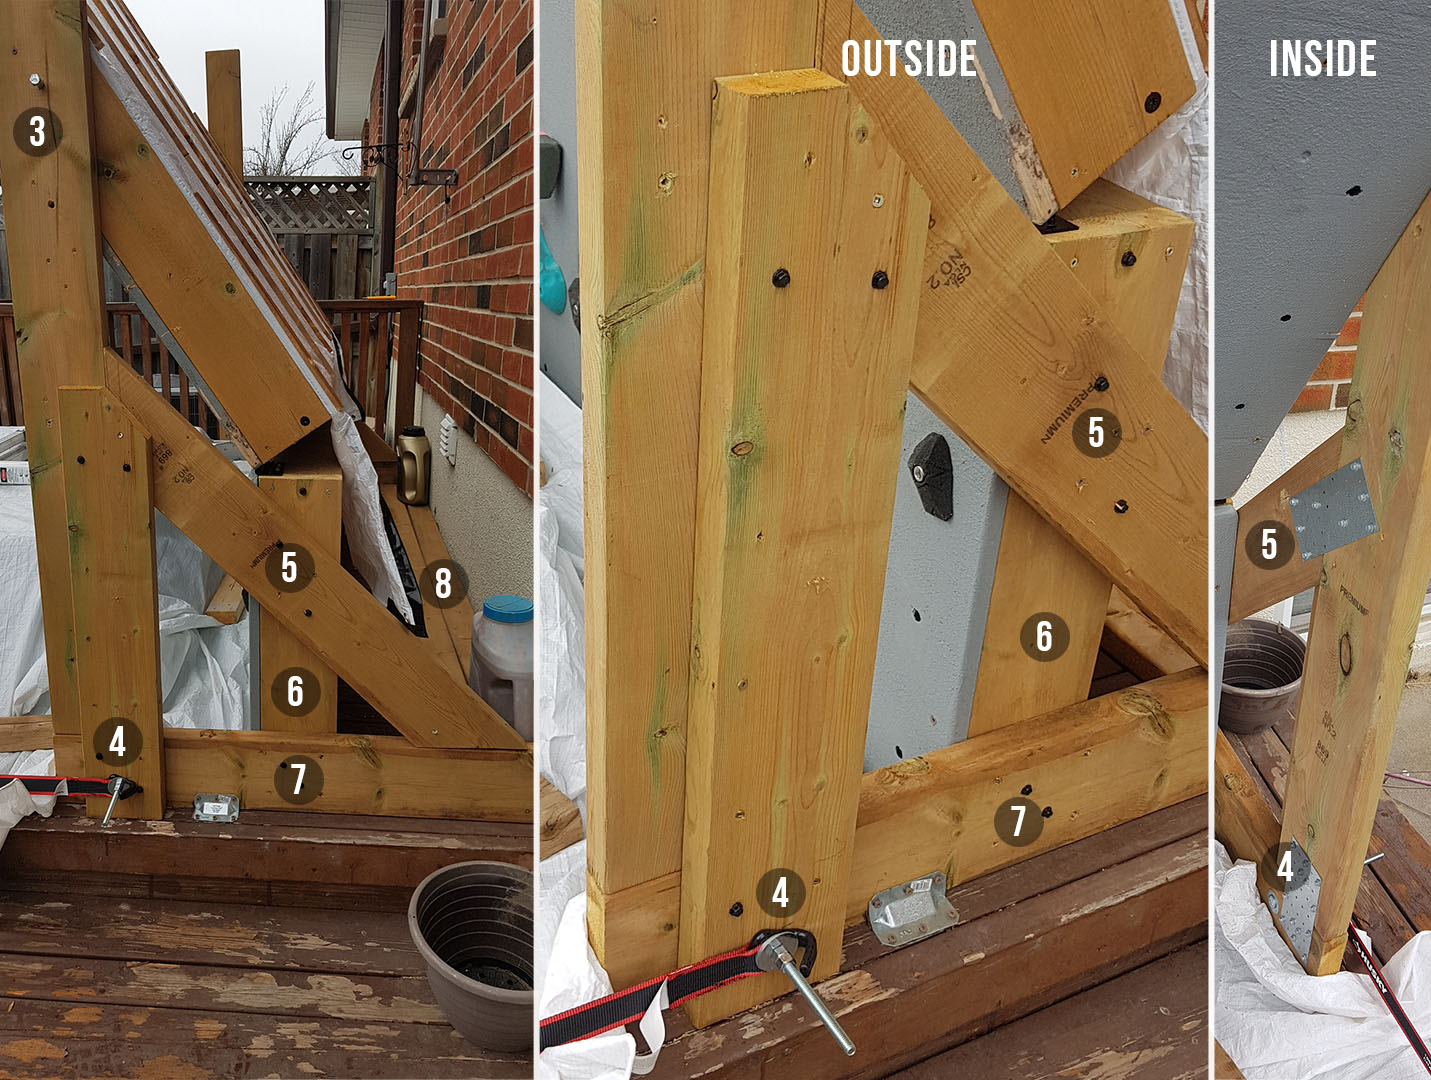
Same numbers/descriptions as above with the addition of 8) Base-plates that run along the back of the structure connecting the triangulated base supports. This keeps them from skewing and allows for a spot to add weights, spikes, or bolt the base to the ground.
I have used extra brackets, and doubled up some lumber, in some places to make sure that any joints/connections stay in their intended positions. I used screws throughout and in some key places added in structural screws that replace lag bolts (seen in black).
If you look carefully, you can see that the structure is screwed into the deck using brackets. While I do consider this a freestanding structure, like a piece of furniture, it is never a bad idea to keep things as safe as possible. This also keeps the structure from sliding along the deck over time.
I live in a rental, so I needed to make something that was technically not permanent. Unfortunately due to uneven ground, and poor drainage, I had to build this on the deck, but the eventual idea is to move it on to the lawn. That will require some work and help from friends, which I cannot call on quiet yet – but hopefully soon, because it would be nice to have some climbing buddies over to enjoy this with.
With that said, this structure does weigh quite a bit, and you are putting extra forces on it while you climb, so I would make sure that before you build it on top of any structure, you make sure that whatever it is can support those loads (no one wants to destroy a beautiful deck, or even worse, hurt someone).
As suggested above using #8 (cross base-plates), when I do move this on the ground where I cannot screw it to existing structure, I will be most likely adding some spikes and weight (probably via cinder-blocks) to ensure it stays put.
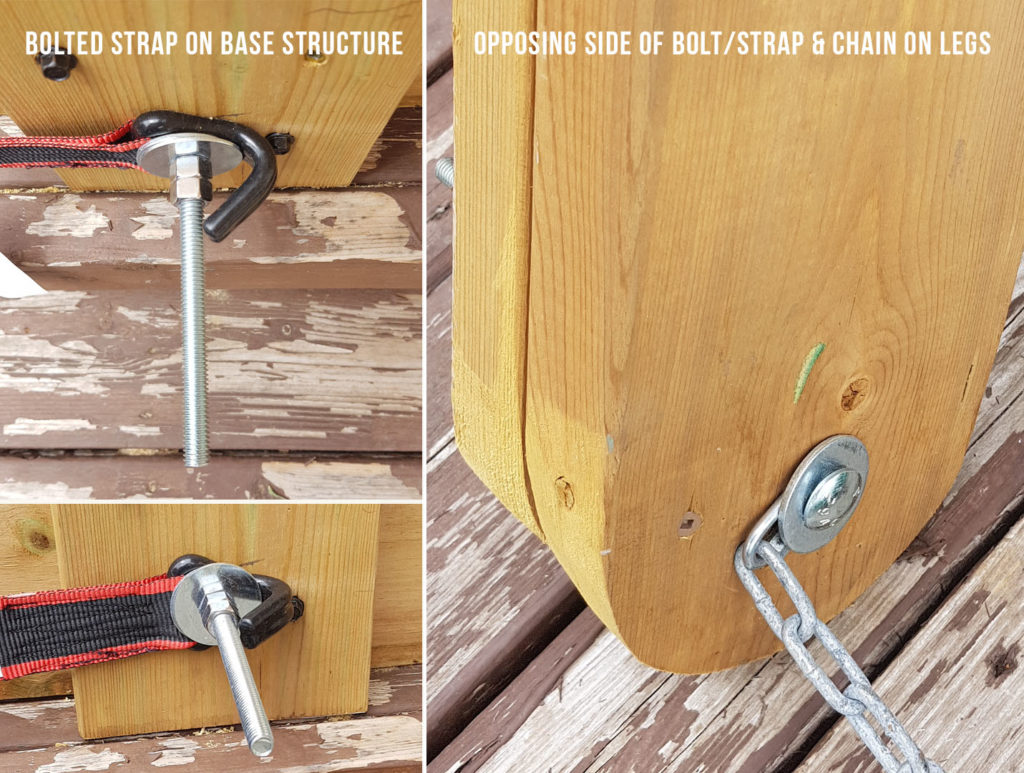
At both the base and the legs, it is bolted through two 2×6″ pieces of lumber with washers and double nuts to lock them in position on the bolt.
A happy accident was that when the washers and nuts are tightened down, the bolt straightens and butts against the hook of the ratchet strap. This just gives a little less possibility for movement, and some extra strength, even if just minimally. What it also does is ensure that if somehow the nuts ever did become loose, they will not be able to rotate themselves off the end of the bolt because they will be stopped by the hooks. On that note, I still need to cut the bolts so they aren’t a tripping hazard, please ignore that for now.
For the ratchet strap, the stronger, the better. Again, I am not an engineer, but at minimum, a safe working load of 1000lbs+ is probably a good place to start. Please consult a professional if you can. Also, the longer the better. It will allow for you to have more range of motion with your legs.
Thanks for checking out this post!
**We’ve continued some work on this, you can find it here: Adjustable Climbing Wall Update